Why do they put fork marks in peanut butter cookies? These iconic marks are more than just a decorative touch they serve an important purpose. Fork marks help flatten the dough, ensuring even baking and achieving the perfect texture. Without them, the dense peanut butter dough might not cook uniformly, resulting in cookies that are either underbaked or too thick. Curious about the history and impact of this tradition on your favorite cookies?
Table of Contents
The Iconic Fork Marks: A Signature Touch
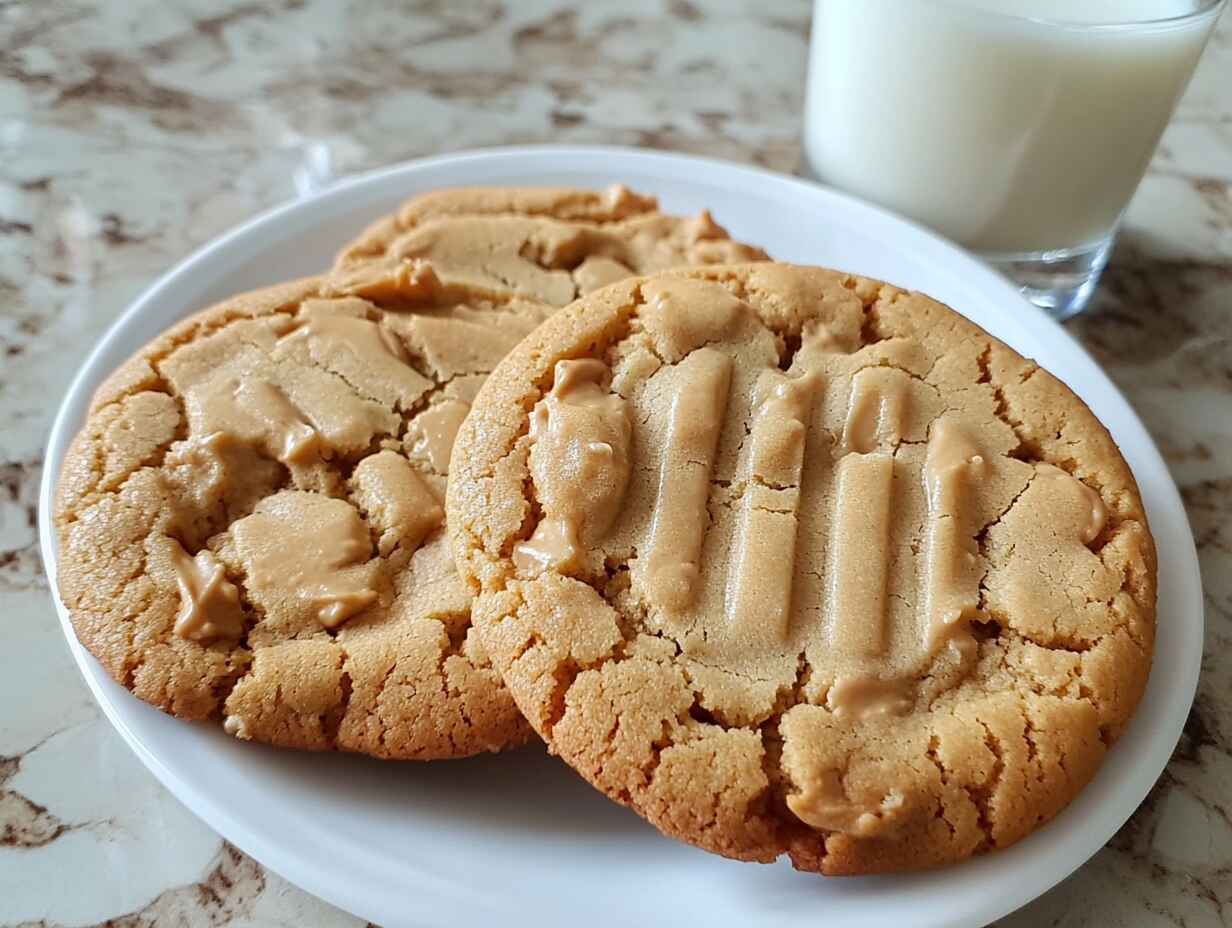
Fork marks in peanut butter cookies aren’t just for decoration they’re a defining feature of this timeless treat. Peanut butter cookies are one of those desserts that bring back warm childhood memories with their golden brown edges, soft, chewy centers, and, of course, the signature fork marks. These crisscross patterns aren’t merely aesthetic; they serve a practical purpose and have become an integral part of peanut butter cookie culture.
The fork marks aren’t just for decoration. In fact, they have a functional purpose, and they’ve become so associated with peanut butter cookies that it’s hard to imagine them without these signature crisscross patterns. This simple yet iconic touch adds to the visual appeal of the cookies, and it also plays a role in how the cookies bake. Let’s dive deeper into the history and reasoning behind this tradition. To learn how these cookies differ from other baked treats, you might also enjoy reading about the difference between chewy and hard peanut butter cookies and how to achieve that perfect balance.
The Purpose of Fork Marks in Peanut Butter Cookies
Now that we know a little bit about the history of fork marks, let’s take a closer look at why they’re actually there. What purpose do these fork marks serve beyond just looking good? Well, it turns out that these marks aren’t just for decoration. There are several key reasons why bakers continue to press the fork into the dough before baking.
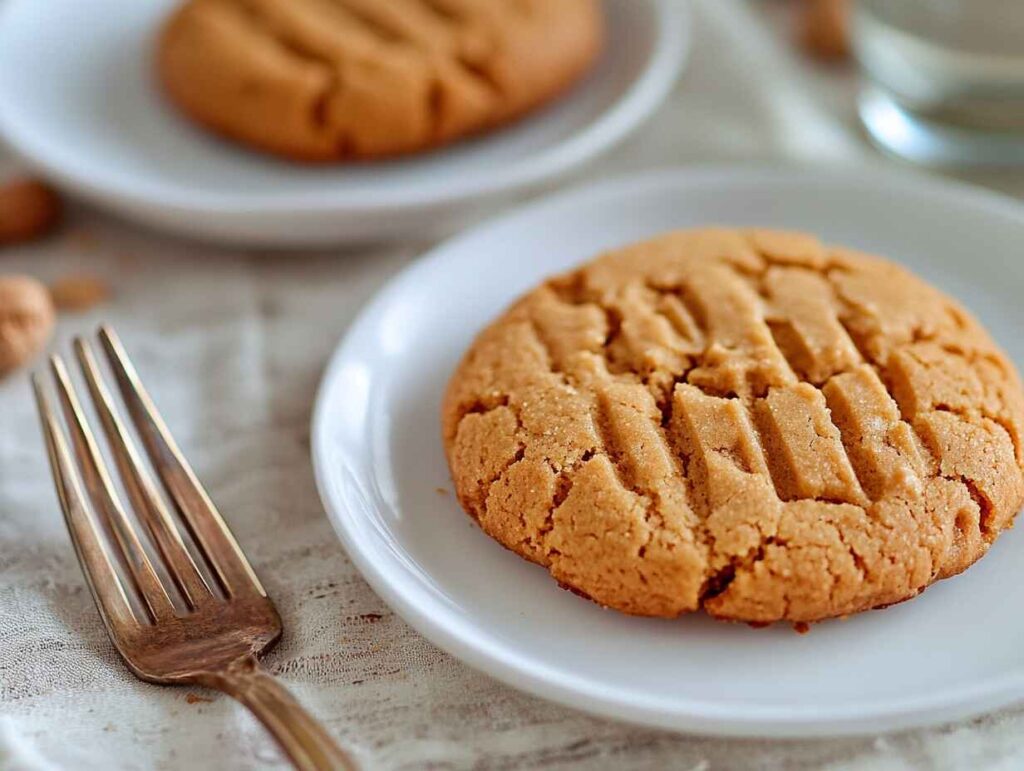
Aesthetic Appeal: Enhancing the Cookie’s Look
Let’s face it when we bake, we don’t just want something that tastes good; we want something that looks appealing too! 🍪 A beautiful presentation can elevate any baked good, and fork marks in peanut butter cookies are no exception. These iconic marks add an attractive, symmetrical design to the surface of each cookie, making them more visually interesting. Whether you’re baking for family, friends, or just for yourself, those crisscross patterns make peanut butter cookies stand out and look extra delicious. The fork marks become part of the signature look that makes peanut butter cookies instantly recognizable! Curious about other cookie tips? Check out this guide on keeping cookies soft and fresh for ideas on preserving that delightful texture.
Texture and Crumb: How Fork Marks Affect the Bake
Fork marks in peanut butter cookies are more than just a visual signature they play a critical role in achieving the perfect texture. By pressing the dough with a fork, you flatten it to allow for more even heat distribution during baking. This ensures the cookie bakes evenly, which is especially important since peanut butter cookie dough tends to be denser than other types.
These fork marks also contribute to the irresistible texture contrast: a slightly crispier edge paired with a soft, chewy center. This balance of crunch and gooeyness is what makes peanut butter cookies so special. Without those iconic fork marks, you might miss out on that perfectly baked, crave-worthy cookie experience. 🍪
If you’re looking to experiment with variations, 4-ingredient peanut butter cookies offer a simple recipe that highlights this baking technique.
Portion Control: Why Fork Marks Can Help with Even Baking
Another reason to use fork marks is to help with portion control. When you flatten the cookie dough with a fork, you’re not just making the cookies look nice you’re also helping to ensure that each cookie bakes in a similar manner. The uniformity of the fork marks allows you to create cookies that are roughly the same size and shape, which means they’ll all bake evenly. This is especially helpful if you’re trying to make a large batch and want every cookie to come out perfect. No more underbaked centers or overcooked edges!
For those trying to master consistency in cookie-making, exploring chewy vs. hard cookies might provide additional insights.
The Role of Fork Marks in Baking Peanut Butter Cookies
Now that we’ve explored the history and purpose behind fork marks, let’s take a deeper dive into the actual science of how they affect the cookie-baking process. While it might seem like a simple visual touch, those fork marks are more than just decoration they play an important role in ensuring your peanut butter cookies come out perfectly every time. So, how exactly do they impact the way the cookies bake? Let’s break it down!
The Science of Fork Marks: Heat Distribution and Cookie Texture
At the most basic level, fork marks help with the even distribution of heat during the baking process. When you press down on the dough with a fork, you are effectively increasing the surface area of the cookie. This allows heat to penetrate more evenly throughout the dough as it bakes. If the dough is left too thick in the center, it might bake unevenly, leaving the center underdone or the edges overcooked. But by pressing the dough flat with fork marks, you ensure that the heat can reach the entire cookie more evenly.
The result? A more consistent baking process that allows the edges to become crispy while the center remains soft and chewy. This is one of the reasons why peanut butter cookies are so delightful you’re getting two textures in every bite. The fork marks help create this ideal balance between crispy and chewy, enhancing the overall experience.
How Fork Marks Affect the Dough’s Consistency
Another important aspect of fork marks in peanut butter cookies is how they impact the consistency of the dough as it bakes. Peanut butter cookie dough tends to be a bit denser than other types of cookie dough. This density can sometimes cause issues during baking, as it might result in cookies that are too thick, not properly cooked through, or unevenly baked.
When you press the dough down with a fork, you’re not only flattening the cookies but also helping the dough spread out in a more uniform manner. The fork marks in peanut butter cookies help prevent the dough from puffing up in the center, which can lead to cookies that are too thick and chewy in some areas. By flattening the dough evenly, you encourage the cookies to bake at the same rate across the entire surface. These fork marks ensure that each cookie has a similar thickness, making it easier to bake a batch of cookies that are all the same consistency. 👌
Visit this handy troubleshooting guide on making perfect peanut butter cookies to address these challenges.
How to Make Perfect Peanut Butter Cookies with Fork Marks
Now that we’ve addressed some of the common problems that might arise, it’s time to focus on how to make the perfect peanut butter cookies with those iconic fork marks. Follow these tips, and you’ll be baking like a pro in no time!
Step-by-Step Guide to Making the Perfect Peanut Butter Dough
Before you can make those perfect peanut butter cookies with fork marks, you need to start with the right dough. Here’s a simple step-by-step guide:
- Step 1: In a large bowl, cream together 1 cup of peanut butter, 1 cup of sugar, and 1 egg until smooth and well combined.
- Step 2: Add 1/2 cup of flour and 1/2 teaspoon of baking soda to the mixture, and stir until just incorporated.
- Step 3: Once the dough is ready, cover it and refrigerate for at least 30 minutes. Chilling the dough is crucial for the fork marks to show up properly and for the cookies to hold their shape.
- Step 4: Preheat the oven to 350°F (175°C) and line a baking sheet with parchment paper.
- Step 5: Roll the chilled dough into 1-inch balls and place them on the baking sheet about 2 inches apart.
Once the dough is prepared and placed on the baking sheet, you can move on to creating those signature fork marks!
The Best Fork Mark Techniques for Beautiful, Tasty Cookies
Now it’s time for the fun part pressing the fork marks into the dough! Here are a few tips:
- Lightly grease the fork with a bit of cooking spray to prevent it from sticking to the dough.
- Press down gently in one direction to create the first set of lines, then rotate the fork 90 degrees and press down again to create the crisscross pattern.
- Be sure not to press too hard, as this can flatten the cookies too much. A light touch is all you need.
Once you’ve created the fork marks, bake the cookies in the preheated oven for about 10 minutes, or until they are golden around the edges. Let them cool on the baking sheet for a few minutes before transferring them to a wire rack to cool completely.
Other Uses for Fork Marks in Baking (Beyond Peanut Butter Cookies)
Fork marks in peanut butter cookies are iconic, but did you know that they aren’t just reserved for these nutty delights? Fork marks have become a staple in other baked goods too, especially in sugar cookies. If you’ve ever baked sugar cookies, you’ve probably noticed that they also often feature fork impressions. So, why do we see fork marks in other cookies and desserts? Let’s explore the versatility of fork marks and how they’re used beyond just peanut butter cookies. 🍪
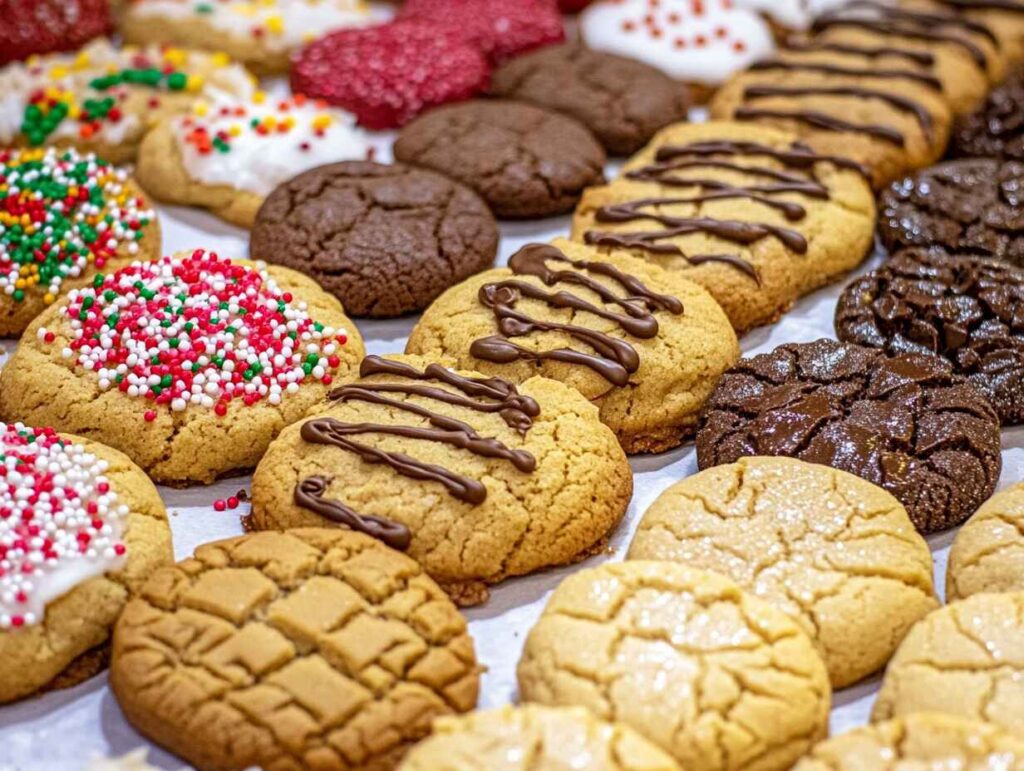
Fork Marks in Sugar Cookies: A Similar Tradition
Just like fork marks in peanut butter cookies, sugar cookies often feature fork marks on top. While sugar cookies have a more delicate texture, the fork marks serve a similar purpose in ensuring even baking and a visually appealing look. Sugar cookies are often thicker than other cookies, so flattening the dough with a fork helps to ensure the heat reaches the center evenly, just like in peanut butter cookies.
In addition, the crisscross pattern gives sugar cookies that familiar “homemade” look. Sugar cookies are a great blank canvas for adding sprinkles, colored sugar, or even icing. The fork marks provide a visual contrast, helping to elevate the cookie’s appearance. As with fork marks in peanut butter cookies, you get the best results when you chill the dough before baking, preventing the dough from spreading too much and distorting the fork pattern.
Fork Marks in Other Desserts and Baked Goods
Interestingly, fork marks in peanut butter cookies aren’t just limited to cookies. You might also see them in other desserts like shortbread or certain types of tarts. In shortbread cookies, for example, fork marks are used not only to decorate but also to help reduce the thickness of the dough. This ensures that the cookies bake evenly and achieve that signature melt-in-your-mouth texture. The fork marks also help to give the cookies a rustic, homemade look, which is exactly what you want for this type of classic dessert.
Similarly, in some savory baked goods like quiches or savory tarts, fork marks are used to prevent the dough from puffing up in the oven. By creating these impressions, the dough stays flat and bakes evenly. The fork marks, much like those in peanut butter cookies, aren’t necessarily for decoration but for practicality, helping the crust stay crisp and uniform while the filling cooks.
Nutrition Facts for Peanut Butter Cookies
Now that we’ve covered everything from the history of fork marks to how to perfect your peanut butter cookies, you may be wondering about the nutritional value of this delicious treat. After all, cookies are a treat we indulge in, and knowing the nutritional facts can help you enjoy them mindfully. Here’s a breakdown of the typical nutrition facts for a classic peanut butter cookie made with standard ingredients:
| Nutrition Facts | Amount per Serving (1 Cookie) |
|---|---|
| Calories | 150 |
| Total Fat | 8g |
| Saturated Fat | 1g |
| Cholesterol | 15mg |
| Sodium | 90mg |
| Total Carbohydrates | 19g |
| Dietary Fiber | 1g |
| Sugars | 12g |
| Protein | 3g |
| Iron | 1mg |
| Calcium | 10mg |
These values are based on a standard peanut butter cookie made with peanut butter, sugar, and egg. Of course, the actual nutritional content may vary depending on the specific ingredients and portion size. If you’re looking to cut back on sugar or fat, you can always try making healthier substitutions, like using a sugar alternative or opting for a natural peanut butter without added oils and sugars. Just remember everything in moderation! 🍪
Frequently Asked Questions (FAQ)
What role do fork marks play in baking peanut butter cookies?
The fork marks help distribute heat evenly across the dough, ensuring the cookies bake uniformly. This is particularly important because peanut butter dough tends to be dense, which can cause uneven baking without the marks.
Can I skip the fork marks when making peanut butter cookies?
While it’s possible to skip the fork marks, doing so may result in cookies that are unevenly baked or too thick. The marks help ensure the cookies are properly flattened for even heat distribution, which is key to achieving the right texture.
Are fork marks only for peanut butter cookies?
No, fork marks are used in other baked goods as well, such as sugar cookies, shortbread, and even savory tarts. They serve a similar purpose, like helping to ensure even baking and creating a rustic, homemade look.
Conclusion: Why Do They Put Fork Marks in Peanut Butter Cookies?
There’s no denying that fork marks have become an integral part of what makes peanut butter cookies so special. From their historical roots to their role in ensuring even baking and a perfect texture, fork marks are much more than just a decorative touch they’re a vital part of what makes peanut butter cookies the beloved treat they are today. Whether you’re baking them for a holiday, a family gathering, or simply for a delicious snack, those fork marks represent a tradition of homemade goodness and a commitment to making the best cookies possible.
Next time you pull a batch of peanut butter cookies out of the oven, take a moment to appreciate those crisscrossed lines. They’re not just there for looks they’re a vital part of the baking process, helping create the perfect texture and shape. And as you bite into the soft, chewy center and savor the nutty flavor, you’ll know that those fork marks played a small but crucial role in making your cookies just right. 🍪
For more inspiration, check out recipes like the ultimate brookie recipe to explore unique dessert creations. Happy baking! 🍪
Print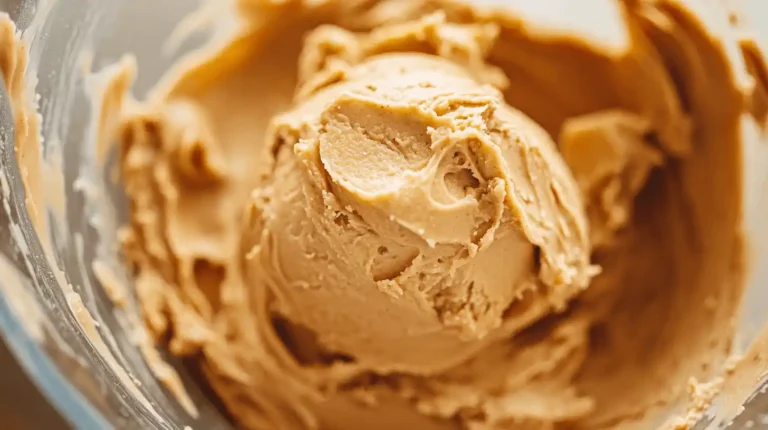
Why Do They Put Fork Marks in Peanut Butter Cookies? Discover the Secret Behind Perfect Texture!
This simple and delicious peanut butter dough is the key to making the perfect peanut butter cookies with that signature crisscross fork pattern. With just a few ingredients, you’ll create soft, chewy cookies with crispy edges. The dough is easy to prepare and can be chilled for optimal results, ensuring your cookies bake evenly every time.
- Total Time: 40 minutes
- Yield: 24 cookies (approximately)
Ingredients
1 cup peanut butter (creamy or chunky),
1 cup granulated sugar,
1 large egg,
1/2 cup all-purpose flour,
1/2 teaspoon baking soda.
Instructions
- Cream together the peanut butter and sugar: In a large bowl, mix 1 cup peanut butter and 1 cup granulated sugar. Beat until smooth and well combined.
- Add the egg: Add 1 large egg and continue mixing until fully incorporated into the peanut butter mixture.
- Incorporate the dry ingredients: Sift together 1/2 cup of flour and 1/2 teaspoon baking soda. Gradually add to the peanut butter mixture, stirring until just combined.
- Chill the dough: Cover the dough and refrigerate it for at least 30 minutes. This step is crucial to help the dough hold its shape when you make the fork marks.
- Shape the dough: Preheat your oven to 350°F (175°C). Roll the chilled dough into 1-inch balls and place them about 2 inches apart on a parchment-lined baking sheet.
- Create fork marks: Lightly grease a fork with cooking spray, then press each ball of dough down with the fork, creating a crisscross pattern.
- Bake: Bake the cookies for 10 minutes or until the edges are golden brown.
- Cool: Allow the cookies to cool on the baking sheet for a few minutes before transferring them to a wire rack to cool completely.
Notes
For thicker cookies, refrigerate the dough longer.
If you prefer a sweeter cookie, you can add a bit of vanilla extract or a pinch of salt to the dough.
If you like a chunky texture, use crunchy peanut butter instead of creamy.
- Prep Time: 10 minutes
- Cook Time: 10 minutes
- Category: Dessert
- Method: Baking
- Cuisine: American
- Diet: Gluten Free