Nothing beats the smell of apple pie baking in your kitchen. The sweet cinnamon aroma. The golden, flaky crust. The bubbling fruit filling. It’s pure comfort in a dish.
I’ve tested dozens of apple pie recipes over the years. Some had mushy apples. Others had soggy bottoms. A few were just bland. This recipe fixes all those problems.
You’ll get a crispy, buttery crust. Tender apples with the perfect bite. A filling that’s juicy but never runny. And the best part? It’s actually simple to make.
No fancy techniques. No pre-cooking the apples. Just straightforward steps that work every single time.
Why This is the Best Apple Pie Recipe
The Perfect Blend of Apples
Most people grab whatever apples look good at the store. Big mistake.
You need two types of apples. Tart ones and sweet ones. The tart apples hold their shape when baked. The sweet ones add natural sugar and depth.
I use Granny Smith apples for tartness. They’re firm and won’t turn to mush. Then I add Honeycrisp or Gala for sweetness. This combo creates layers of flavor that single-variety pies just can’t match.
Slice them about ¼-inch thick. Thinner slices turn to applesauce. Thicker ones stay too crunchy.
No More Soggy Bottoms!
A soggy bottom crust ruins everything. It’s the #1 complaint I hear about homemade apple pie.
Here’s how we prevent it:
First, we add just enough flour to the filling. It thickens the juices without making the filling pasty or gummy.
Second, we start baking at a high temperature. This sets the bottom crust fast before the juices can soak in.
Third, we use a glass pie dish. You can actually see when the bottom turns golden brown. No guessing games.
And here’s a trick most recipes skip: brush the bottom crust with a thin layer of egg wash before adding the apples. It creates a barrier that keeps moisture out.
A Flaky, All-Butter Crust (With a Shortcut!)
Butter makes the best-tasting crust. Period.
Some recipes use shortening. It makes a flakier crust, sure. But it tastes like cardboard. I’d rather have amazing flavor with good flakiness than perfect flakiness with zero flavor.
My all-butter crust recipe is below. It’s easier than you think. The secret? Keep everything cold. Cold butter. Cold water. Even chill your bowl if you have time.
But let’s be real. Sometimes you’re busy. Sometimes you just don’t want to make crust from scratch. That’s fine. Grab a good store-bought all-butter crust from the refrigerated section. Not the frozen kind. The refrigerated ones are way better.
Ingredients You’ll Need
For the Flaky All-Butter Pie Crust
- 2½ cups all-purpose flour
- 1 tablespoon granulated sugar
- 1 teaspoon salt
- 1 cup (2 sticks) cold unsalted butter, cut into small cubes
- 6-8 tablespoons ice water
For the Juicy Apple Filling
- 4 large Granny Smith apples
- 4 large Honeycrisp or Gala apples
- ¾ cup granulated sugar
- ¼ cup all-purpose flour
- 1½ teaspoons ground cinnamon
- ¼ teaspoon ground nutmeg
- ¼ teaspoon salt
- 1 tablespoon lemon juice
- 1 teaspoon vanilla extract
- 2 tablespoons cold butter, cut into small pieces
For the Egg Wash
- 1 large egg
- 1 tablespoon milk or water
- 2 tablespoons coarse sugar (optional, for sparkle)
A Note on Apples
Don’t use Red Delicious or McIntosh apples. They turn to mush when baked. You want firm apples that hold their shape.
Good choices: Granny Smith, Honeycrisp, Gala, Fuji, Braeburn, or Pink Lady.
Mix tart and sweet for the best flavor. Trust me on this.
How to Make the Perfect Apple Pie from Scratch
Step 1: Prepare the Pie Crust
If making homemade crust:
- Mix flour, sugar, and salt in a large bowl.
- Add the cold butter cubes. Use a pastry cutter or your fingers to work the butter into the flour. Stop when it looks like coarse crumbs with some pea-sized butter chunks.
- Drizzle in ice water, one tablespoon at a time. Mix gently after each addition. Stop when the dough just comes together. Don’t overwork it.
- Divide the dough in half. Shape each half into a flat disk. Wrap in plastic wrap.
- Chill in the fridge for at least 1 hour. This is not optional. Cold dough = flaky crust.
If using store-bought crust:
Let it sit at room temperature for 10-15 minutes. This makes it easier to work with.
Step 2: Make the Apple Filling
- Peel all your apples. Yes, you have to peel them. Apple skins get tough and chewy when baked.
- Core the apples and slice them ¼-inch thick. Try to keep the slices uniform so they cook evenly.
- Put the apple slices in a large bowl.
- In a small bowl, whisk together sugar, flour, cinnamon, nutmeg, and salt.
- Pour the sugar mixture over the apples. Add lemon juice and vanilla extract.
- Toss everything together with your hands. Make sure every apple slice gets coated.
The filling will look dry at first. That’s normal. The apples will release juice as they sit and bake.
Some recipes tell you to pre-cook the apples on the stove. We’re skipping that step. It’s unnecessary and adds extra work. Our method keeps the apples tender with a slight bite. Not mushy. Not crunchy. Just right.
Step 3: Assemble Your Pie
- Preheat your oven to 425°F. Put a baking sheet on the lower rack to catch any drips.
- Roll out one disk of dough on a floured surface. Roll from the center outward. Turn the dough a quarter turn after every few rolls. You want a circle about 12 inches across.
- Carefully transfer the dough to a 9-inch pie dish. Press it gently into the bottom and sides. Let the excess hang over the edge.
- Make your egg wash: beat the egg with milk or water.
- Brush a thin layer of egg wash on the bottom crust. This creates a moisture barrier.
- Pour the apple filling into the crust. Pack the apples tightly. They’ll shrink as they bake, so pile them high.
- Dot the filling with small pieces of cold butter. They’ll melt into the apples and add richness.
- Roll out the second disk of dough into another 12-inch circle.
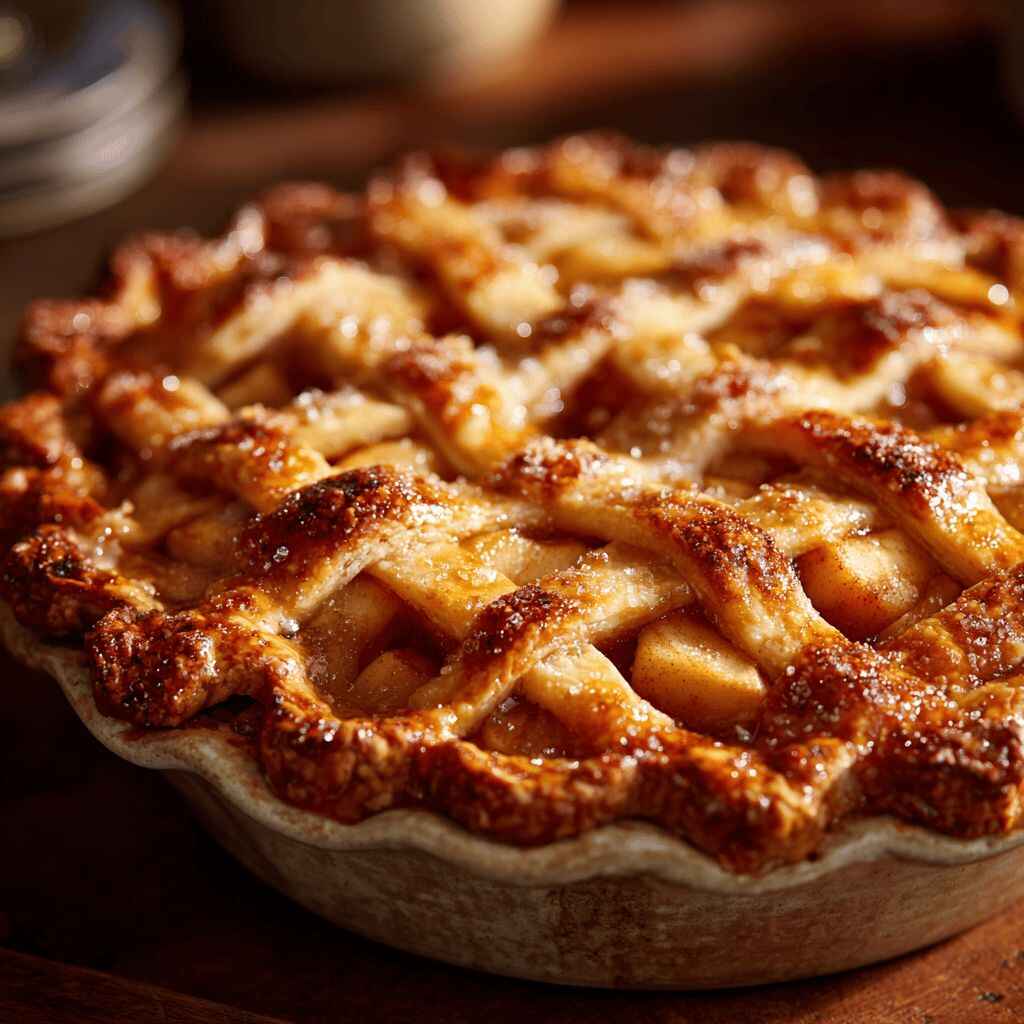
- Place it over the apples. You can do a solid top crust or a lattice pattern. Your choice.
- Trim the excess dough, leaving about ½ inch overhang. Fold the edges under and crimp with your fingers or a fork.
- If using a solid top crust, cut 4-5 slits in the center for steam to escape.
- Brush the entire top with egg wash. Sprinkle with coarse sugar if you want extra crunch and sparkle.
Step 4: Bake to Golden Perfection
- Put the pie on the middle oven rack. Place it on top of the baking sheet you preheated earlier.
- Bake at 425°F for 20 minutes. This high heat sets the crust quickly.
- Reduce the temperature to 375°F. Bake for another 40-50 minutes.
- Watch for these signs: the crust should be deep golden brown. The filling should bubble vigorously through the vents or lattice.
- If the edges brown too fast, cover them with foil or a pie shield. Leave the center exposed.
- Test doneness by inserting a knife through a vent. The apples should feel tender, not crunchy.
- Remove from the oven. Let it cool on a wire rack for at least 3 hours.
I know waiting is torture. But if you cut into a hot pie, the filling will be soup. It needs time to set up and thicken.
Tips for a Flawless Apple Pie
Keep everything cold. Warm butter makes tough, dense crust. Work quickly and chill the dough if it gets soft.
Don’t overwork the dough. Mix just until it comes together. Overworking develops gluten, which makes the crust chewy instead of flaky.
Use a pie shield. The edges always brown faster than the center. Cover them halfway through baking to prevent burning.
Let it cool completely. This is the hardest tip to follow. But a fully cooled pie slices cleanly and tastes better.
Pile the apples high. They shrink a lot during baking. What looks like too many apples will be just right when it’s done.
Use a glass pie dish. You can see the bottom crust and know when it’s properly browned.
Apple Pie FAQ
What is the secret to a good apple pie?
The secret is using two types of apples. Mix tart Granny Smith with sweet Honeycrisp or Gala. This creates layers of flavor that single-variety pies can’t match. Also, keep your pie dough cold and don’t skip the egg wash on the bottom crust. It prevents sogginess.
Should you cook apples before putting them in a pie?
No, you don’t need to pre-cook the apples. It adds extra work and doesn’t improve the final result. Raw apple slices bake perfectly in the oven. They turn tender with a slight bite, not mushy. Just toss them with sugar, flour, and spices, then pile them into your crust.
What is the secret ingredient in apple pie?
Lemon juice. Just one tablespoon makes a huge difference. It brightens the flavor and keeps the apples from browning. You won’t taste the lemon, but you’ll notice something’s missing without it. Vanilla extract is another secret weapon that adds depth without being obvious.
What is the most common mistake people make when making apple pie?
Cutting into the pie too soon. I know it’s hard to wait, but hot pie filling is liquid. Let it cool for at least 3 hours. This allows the filling to thicken and set properly. Otherwise, you’ll have apple soup running all over your plate. The second biggest mistake is using soft apples like Red Delicious. They turn to mush. Always choose firm varieties.
How to Serve and Store Your Apple Pie
Serve warm or at room temperature. Never straight from the oven.
Top with vanilla ice cream. The contrast of warm pie and cold ice cream is unbeatable. Whipped cream works too.
Some people love a slice of sharp cheddar cheese with apple pie. It sounds weird but the salty-sweet combo is incredible. Try it before you judge.
Store leftovers covered at room temperature for 2 days or in the fridge for up to 5 days.
Reheat individual slices in the microwave for 30 seconds. Or warm the whole pie in a 350°F oven for 15-20 minutes.
Conclusion
This apple pie recipe has never let me down. The crust is buttery and crisp. The filling is perfectly spiced and juicy. And it’s way easier than most recipes make it seem.
Make this for Thanksgiving. Make it for Sunday dinner. Make it just because you want pie on a Tuesday.
Your kitchen will smell amazing. Your family will ask for seconds. And you’ll have a recipe you can count on for years to come. if you are pie lovers take a look for the best pecan pie recipe.
Print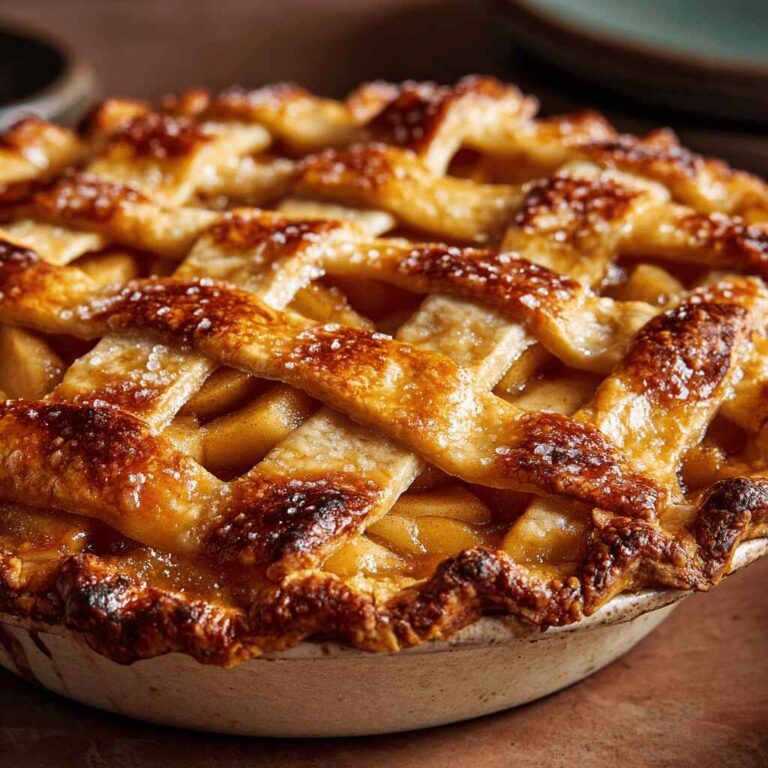
The Perfect Easy Apple Pie Recipe
This easy apple pie recipe delivers a flaky all-butter crust and perfectly spiced apple filling every single time. No soggy bottom, no mushy apples. Just a classic homemade pie with tender fruit and golden, crispy pastry. Perfect for holidays, family dinners, or any time you crave comfort food.
- Total Time: 4 hours 40 minutes
- Yield: 8 servings
Ingredients
For the Flaky All-Butter Pie Crust:
- 2½ cups all-purpose flour
- 1 tablespoon granulated sugar
- 1 teaspoon salt
- 1 cup (2 sticks) cold unsalted butter, cut into small cubes
- 6–8 tablespoons ice water
For the Juicy Apple Filling:
- 4 large Granny Smith apples
- 4 large Honeycrisp or Gala apples
- ¾ cup granulated sugar
- ¼ cup all-purpose flour
- 1½ teaspoons ground cinnamon
- ¼ teaspoon ground nutmeg
- ¼ teaspoon salt
- 1 tablespoon lemon juice
- 1 teaspoon vanilla extract
- 2 tablespoons cold butter, cut into small pieces
For the Egg Wash:
- 1 large egg
- 1 tablespoon milk or water
- 2 tablespoons coarse sugar (optional)
Instructions
Make the Pie Crust:
- Mix flour, sugar, and salt in a large bowl.
- Add cold butter cubes. Use a pastry cutter to work butter into flour until mixture looks like coarse crumbs with pea-sized chunks.
- Add ice water one tablespoon at a time. Mix gently until dough just comes together.
- Divide dough in half. Shape into flat disks. Wrap in plastic wrap.
- Chill for at least 1 hour.
Prepare the Apple Filling:
- Peel, core, and slice apples into ¼-inch slices.
- In a small bowl, whisk together sugar, flour, cinnamon, nutmeg, and salt.
- Toss apples with sugar mixture, lemon juice, and vanilla extract. Set aside.
Assemble the Pie:
- Preheat oven to 425°F. Place a baking sheet on the lower rack.
- Roll out one dough disk into a 12-inch circle. Transfer to a 9-inch pie dish.
- Beat egg with milk to make egg wash. Brush bottom crust with a thin layer.
- Add apple filling. Pack apples tightly and pile them high.
- Dot filling with small butter pieces.
- Roll out second dough disk. Place over apples. Trim excess, leaving ½-inch overhang.
- Fold edges under and crimp. Cut 4-5 steam vents in top crust.
- Brush top with egg wash. Sprinkle with coarse sugar.
Bake the Pie:
- Bake at 425°F for 20 minutes.
- Reduce temperature to 375°F. Bake 40-50 minutes more.
- Pie is done when crust is deep golden brown and filling bubbles vigorously.
- Cover edges with foil if they brown too fast.
- Cool on a wire rack for at least 3 hours before slicing.
Notes
Apple Selection: Use a mix of tart and sweet apples. Granny Smith + Honeycrisp or Gala works best. Avoid soft apples like Red Delicious or McIntosh.
Store-Bought Crust: You can use refrigerated all-butter pie crusts to save time. Let them warm up for 10-15 minutes before unrolling.
Make Ahead: Assemble the pie and freeze unbaked for up to 3 months. Bake from frozen, adding 15-20 minutes to baking time.
Storage: Store at room temperature for 2 days or refrigerate for up to 5 days. Reheat slices at 350°F for 10 minutes.
Prevent Soggy Crust: The egg wash barrier and high initial baking temperature are key. Don’t skip these steps.
- Prep Time: 30 minutes
- Cook Time: 60-70 minutes
- Category: Dessert
- Method: Baking
- Cuisine: American
- Diet: Vegetarian