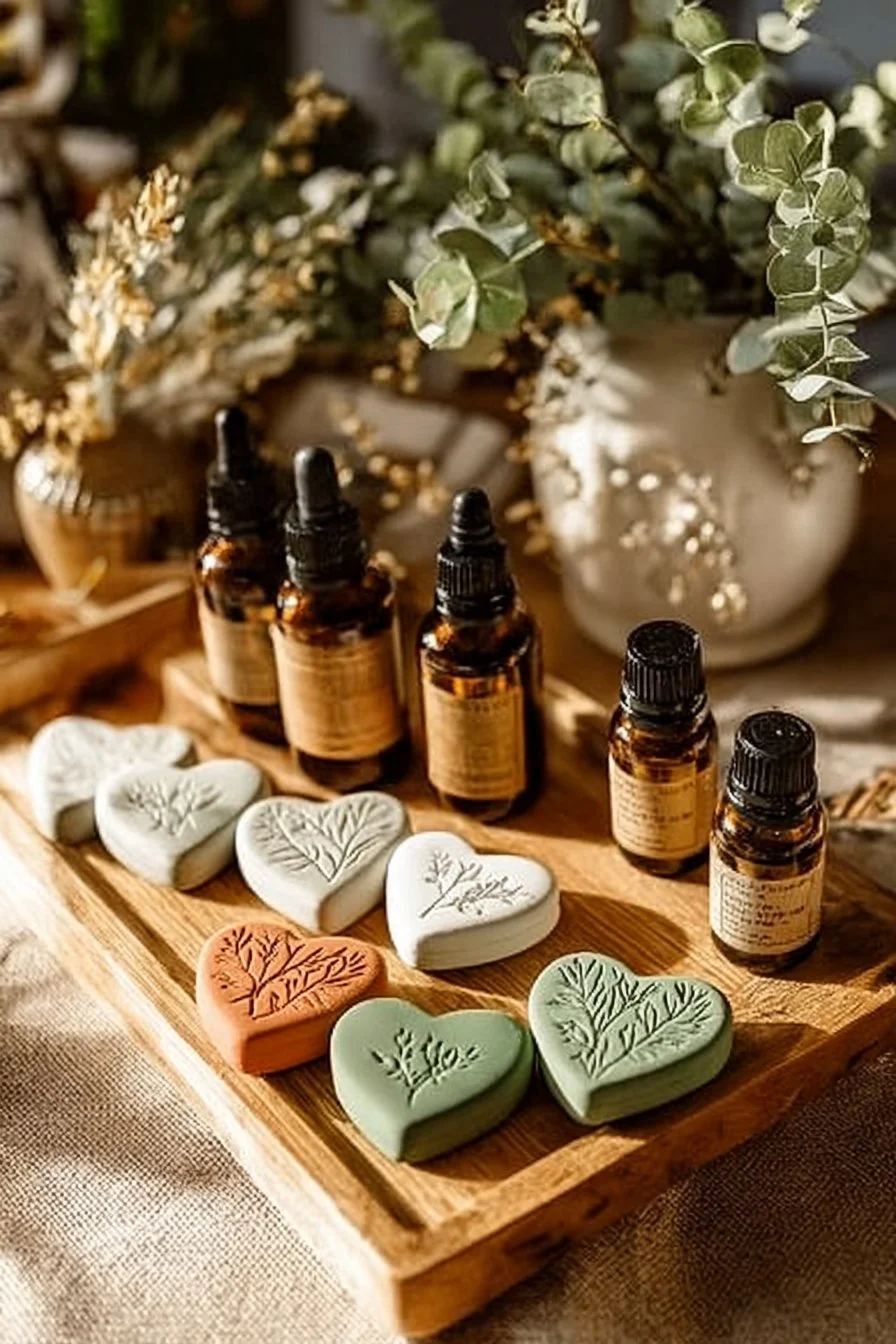
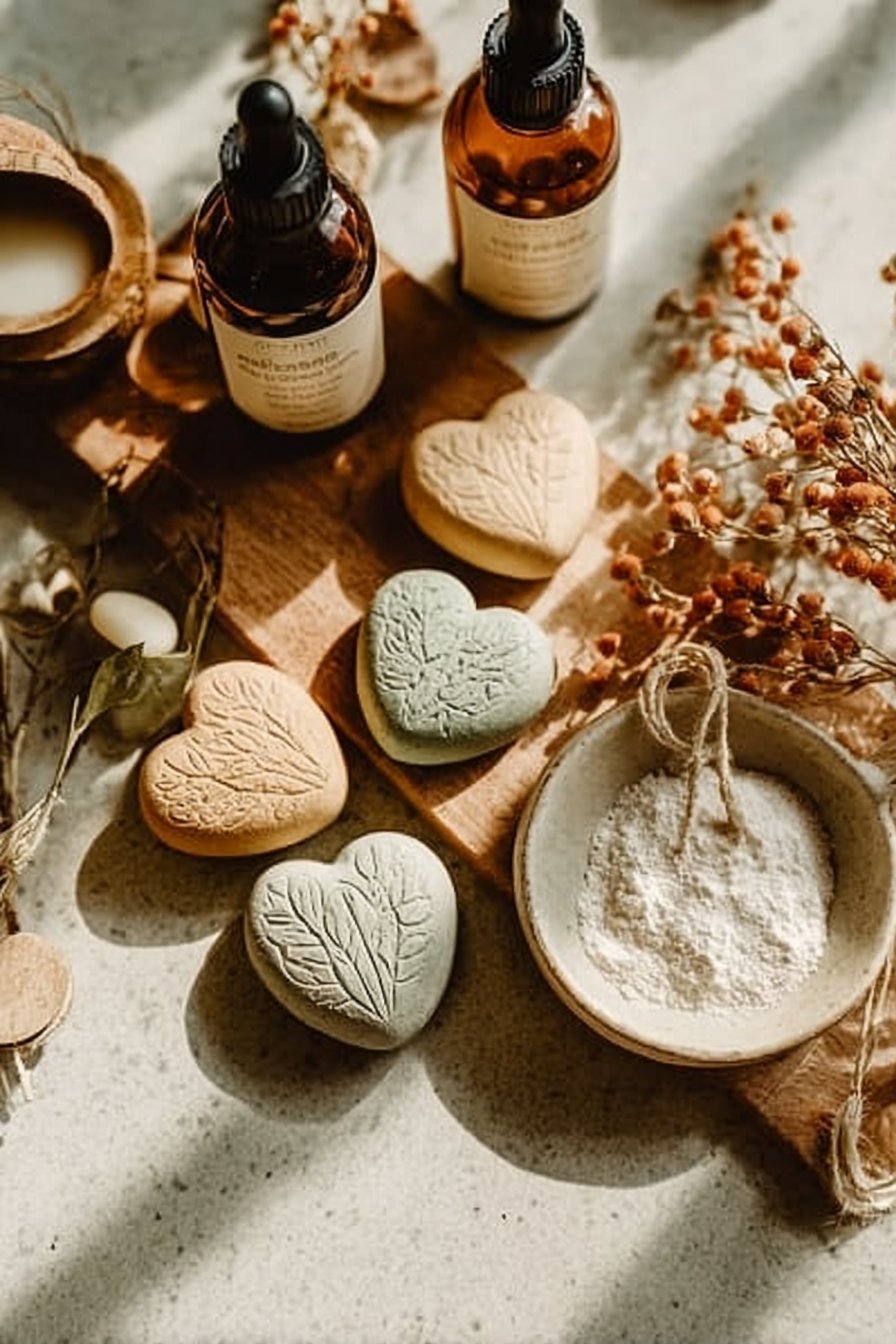
Are you a busy individual who craves a calming atmosphere but struggles to find the time? Or perhaps you’re longing to freshen up your living space without resorting to chemical-laden sprays? Look no further! Today, we’re diving into the art of creating DIY Clay Diffuser Stones. These charming little rocks don’t just look good; they also help fill your home with delightful scents that bring a sense of tranquility to your everyday hustle.
These homemade clay diffuser stones are not only simple to make, but they also serve as a beautiful way to diffuse essential oils. With a soft, porous texture, these stones absorb your favorite oils and release a gentle fragrance into the air, making your space feel warm and inviting. They’re perfect for any room in your home or even your workspace!
Here are just a few reasons why you should try making your own clay diffuser stones. First, they are incredibly easy to make and require minimal supplies. Second, you’ll have the ability to choose your favorite essential oils, customizing the scent to your personal preference. And last but not least, they add an artistic touch to your home decor while promoting relaxation and wellness.
Why You’ll Love This Recipe
- Easy to Make: Requires just a few simple ingredients.
- Customizable Scents: Choose any essential oils you adore.
- Eco-Friendly: Made from natural clay, no harmful additives.
- Stylish Decor: Enhance your home aesthetics while enjoying lovely fragrances.
Ingredients for DIY Clay Diffuser Stones
- 1 cup Air-dry clay
- 2 tablespoons water
- 10-20 drops of your favorite essential oil
- Optional: Cookie cutters or molds for shaping
Step-by-Step Instructions for DIY Clay Diffuser Stones
- Mix the clay and water in a bowl until a smooth dough forms.
- Knead the dough for a few minutes until it’s soft and pliable.
- Add essential oils to the mixture and knead again to evenly distribute the scent.
- Shape the clay using cookie cutters or molds to create your desired forms.
- Let the stones dry in a cool, dry place for 24-48 hours until hard.
- Place the stones around your home and enjoy the gradual release of fragrance.
Tips for Success
- Don’t rush the drying process: Allow the stones to fully dry to enhance their durability.
- Experiment with scents: Mix different oils for unique blends that uplift your mood.
- Keep them out of direct sunlight: This helps preserve the colors and scents for a longer time.
Substitutions & Variations of DIY Clay Diffuser Stones
To Make It Vegan/Gluten-Free: Since air-dry clay is typically vegan and gluten-free, this recipe is suitable for most diets.
Variations: Try dyeing the clay with food coloring for a fun twist or add dried flowers and herbs for extra texture and scent!
Storage Instructions for DIY Clay Diffuser Stones
Refrigerator: This recipe doesn’t require refrigeration, but keep your finished stones in a cool, dry place.
Freezer: Store properly; freezing is not recommended as it may alter the clay’s texture.
Make-Ahead: You can make a batch ahead of time and store them in an airtight container until you’re ready to use them.
Frequently Asked Questions (FAQ) of DIY Clay Diffuser Stones
Can I use any type of essential oil?
Yes! Just ensure it’s suitable for aromatherapy use.
How long will the stones last?
If stored correctly, they can last for several months. Reapply essential oils as needed.
How do I refresh the scent?
Simply add a few more drops of your chosen essential oil to the stone as the scent fades.
Final Toughts
There’s something wonderfully satisfying about making your own DIY Clay Diffuser Stones. Not only do they enrich your living space with delightful aromas, but they also serve as a creative outlet. Give this project a try and fill your home with calming scents that make every moment a little brighter. We’d love to hear how your stones turned out leave a comment and a star rating to share your experience!
Print
DIY Clay Diffuser Stones
Create beautiful DIY clay diffuser stones to fill your home with calming scents using essential oils.
- Total Time: 1440 minutes
- Yield: Approximately 6 stones
Ingredients
- 1 cup Air-dry clay
- 2 tablespoons water
- 10–20 drops of your favorite essential oil
- Optional: Cookie cutters or molds for shaping
Instructions
- Mix the clay and water in a bowl until a smooth dough forms.
- Knead the dough for a few minutes until it’s soft and pliable.
- Add essential oils to the mixture and knead again to evenly distribute the scent.
- Shape the clay using cookie cutters or molds to create your desired forms.
- Let the stones dry in a cool, dry place for 24-48 hours until hard.
- Place the stones around your home and enjoy the gradual release of fragrance.
Notes
Allow the stones to fully dry to enhance their durability and keep them out of direct sunlight to preserve colors and scents.
- Prep Time: 10 minutes
- Cook Time: 0 minutes
- Category: DIY & Crafts
- Method: Crafting
- Cuisine: N/A
- Diet: Vegan